Happy February everyone. Today I am sharing with you a vintage box I found at a yard sale last summer. During the hot days of summer a small town near where I live has a city wide yard sale. Every house, business, parking lot and driveway is filled and overflowing with tables and lots of “stuff” to sell. I mean everything under the sun. Lots of fun objects to choose from and look at. An absolutely fun day.
Moving on, or I will talk about it forever, I would like to share with you this little 6 slotted box. I found it on the ground and I really liked the natural weathering and rustic look. So I picked it up and it was mine for a buck. My kind of price!

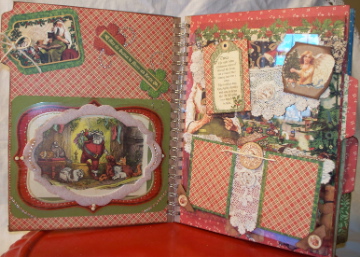
Above is a picture of the whole project. You can see how the
box is divided into 6 sections.

The sewing machine is highlighted with WOW embossing
powders. I used both the silver and hop pink.

The center of the box is highlighted using "Singer Sewing
Centers" taken from a vintage Ladies Home Journal, 1952.

The bottom half of the box is above. The chipboard spool
and scissors is also from Basically Bare. Really cute and oh
so easy to use. The scissors are also embossed with WOW
powders.

WOW embossing powders are so colorful and easy to use.
You will really love this product.

A quick look again at the whole project.
Have fun and try new things. Just think it up and go with it.
I enjoyed sharing this with you today and until next time.
Sandra
A Proud Member of Basically Bare. Click on over to see what we are doing.