It is my pleasure to bring to you a blog site full of ideas, projects and techniques. Please take your time to go through it. You are more than welcome to use my ideas for your own personal use. I do ask that you do not use my ideas for submissions to contests, publications or to sell. I would love to see any ideas of mine created by you. I will be more than pleased to display them here on my blog. Please be aware that some of my acrylic books have been copyrighted and cannot be copied.

Wednesday, December 9, 2009

Challenge for Whimsical Scraps & Bugs

My last challenge for Whimiscal Scraps & Bugs was to create a "white on white" card. I did just that. I used white Bazzill paper with a wreath made from Prima white flowers. Two posts ago I gave a quick tutorial on how to make these flowers. Check it out!
The wreath was then glossed over with Crystal Stickles and tied with a white organza ribbon. I must say the effect is truly simple and beautiful. The word Christmas was cut out on the Cricut from a glittery paper.
I hope you enjoy the post and try something new today. Happy scrappin'.
Sandra

A Proud Member of The Lime Light. Click on over to see what we are doing.

Tuesday, December 1, 2009

Graphics 45 "Party Dress"


Front of dress.

Hand-made flower and rolled waist frills.
Back of Dress
Side
Side
The wire form I used was purchased at JoAnn's. I had been looking for one for a while and came across this one by accident.
I thoroughly love the Graphics 45 papers. The prints and choices from the different groupings are so well thought out and crafted. A couple months ago when I first saw the Graphics 45 Line at Scrapbook Village I knew I had to have it all. Over time I have collected it and now I am starting to use it. I am so careful how I use it because I like it so much and don't want to waste it. I hope you enjoy looking at my photos of this project and give it a try. I am going to keep this dress and put it on my permanent display shelf.
Any questions, feel free to email me. The link is on the right side of my page.
Thanks for checking in and happy scrappin'.
Sandra
A Proud Member of The Lime Light. Click on over to see what we are doing.

Friday, November 27, 2009

SEI Velvet Holiday Collection


A beautiful poinsettia made from the Velvet Assortment, Holiday Collection by SEI. Very easy to work with and the colors are so rich and real. The poinsettia is made from an easy pattern that I will post later. Also the directions for the origami white flower in the center will be posted at the same time.
You will need.....
After cutting out the green leaves and the red flower petals, bear down with the ball end of your rub on tool. This makes an indentation that resembles veins for each leaf.

If you choose to add Stickles, along the vein lines, now is a good time. Just let dry thoroughly before assembling flower.

Start assembling the red flower on top of the green leaves.

Adhere the white flower petals to the smaller round disk.

Adhere white flower to red poinsettia.
The poinsettia looks so beautiful when it is adhered to a present. I thoroughly enjoyed making this flower. I am pleased that I had this opportunity to bring this to you. Happy scrappin' and try something new today.
Sandra

PATTERNS
The poinsettia pattern can be found at the following site:


Below is the poinsettia that I made using this flower method. The information below is from a website on the Imaginisce blog.
Here's step-by-step instructions.

Flower Materials needed:

- Card Stock
- Craft Knife
- Craft Adhesive
- Clothes Pins

Instructions:

1: [Pic I] Cut five squares from your card stock measuring 100 mm x100 mm. NOTE: Each 100 mm x 100 mm square makes one of the five petals needed to complete a flower.


2: [Pic II] Place one sheet of paper with the main pattern you want on the outside of the flower facing downwards. Fold the bottom corner up to the top to make a triangle.


3: [Pic III] Bring the side points up to the top point so that it makes a diamond.


4: [Pic IV] Fold the top layers back so the the edges run vertical with the centre, now line up with the corner sides of the square underneath. If you have folded it correctly you should have 2 horizontal edges, as shown.


5: [Pic V] Open up each of the newly formed triangles and fold down onto themselves so that the old corner fold line is now in the centre of a kite shaped top layer.


6: [Pic VI] Fold the points of the kites inwards so that the corners align with the square underneath.


7: [Piv VII] Fold the kites in half again, over existing creases. Once folded, glue the 2 outside faces together and pin together with a clothes peg until the glue is dry.


8: [Pic VIII] Your finished petal should look like image shown. Repeat steps for all 5 sheets of paper and glue each petal together to form your flower.


NOTE: Repeat origami flower as many times as needed to assemble your flower.


A Proud Member of The Lime Light. Click on over to see what we are doing.

Saturday, November 14, 2009

Using Flowers to make a Wreath


A few months ago I was given a project to do and I needed to use as much of the items left from the last class I gave. Well, I did it. I made a wreath and a tree out of white flowers from the last project. Below you will find exactly how to do it. It does not take much to make these beautiful wreaths and/or tree. On the tree I added green flowers also to add to the beauty. Take your time and look at each photo, try it. It is really fun!

Items needed.
I taught a class on how to make these. Above the wreath is being put together.
Cutting the flowers. Cut them in half then take off the petals.
Start stacking the petals, one on the other. Just build on each row.

When the wreath is all together, use crystal Stickles to add shimmer and beauty. Paint it on with a paint brush.


This is a simple and beautiful project. It can be accomplished within 2 hours and look like you spent much longer on it. Give it a try. Happy scrappin'.
Sandra


A Proud Member of The Lime Light. Click on over to see what we are doing.

Wednesday, November 4, 2009

PRINCESS Cover for 12x12 Scrapbook Album

PRINCESS Paper by Imaginisce
For a while I have been wanting to make the cover for a 12x12 album that was special for a princess. Below you will find my album cover. The photos will show you how to make your castle and mount it on your album. The castle design is my own design. I wanted 5 towers and a wall around the perimeter. My final design is all original and shows the amount of detail needed for a cover. Enjoy looking at the photos.

Above is the cover on blue paper with a few clouds in the background.
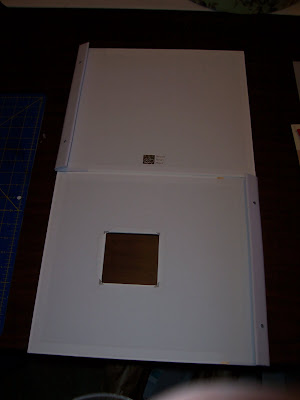
I chose a white 12x12 album made by Bazzill for the album. White is a great color because it will not conflict with your chosen colors and also looks so clean.

The blue paper was decoupage'd on the cover.
The first spire. You need to work from the back spire to the front. Building on each. This helps to create depth.
The scallops were cut on my Cricut and added individually. They were in sets of 4 scallops each which worked out well to allow me to customize and cut as needed.

Take your time as you glue on the scallops (roofing). Trim when all is dried creating an exact curvature.


All the base elements are completed and now the fun part comes. Decorating. Let your imagination run wild. Imagination - Imaginisce. They go together, that is one reason I chose this line of papers. They are so girlie, pink and the patterns are complimentary to each other.
The album finished from the side.
Add lots of bling, pearls and rub-ons. Think about what you would like your castle to look like. Then just "do it".


I hope you enjoyed this small tutorial. I will be happy to answer any and all questions. Feel free to ask me. Just have fun and create your heart's desire.
Remember to try something new today and happy scrappin'.
Sandra
A Proud Member of The Lime Light. Click on over to see what we are doing.